Model Train-related Notes Blog -- these are personal notes and musings on the subject of model train control, automation, electronics, or whatever I find interesting. I also have more posts in a blog dedicated to the maintenance of the Randall Museum Model Railroad.
2025-03-20 - Indicator for Turnout T330
Category Arduino
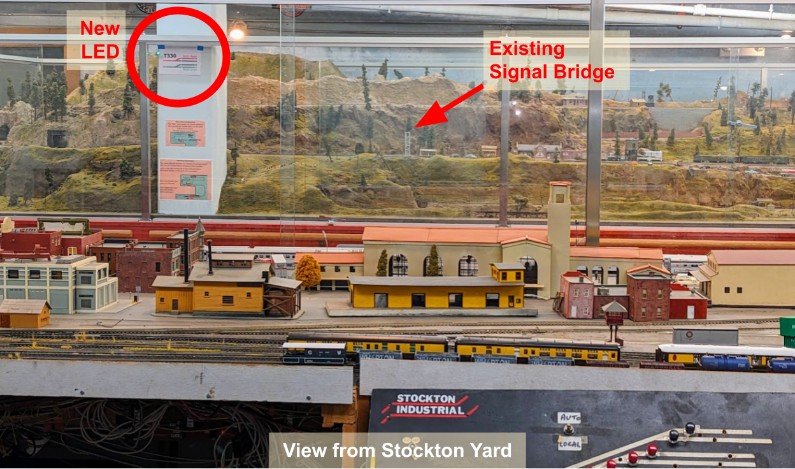
Here’s a new a experiment: we now have a new visual indicator of the position of the Sonora turnout T330, designed to be visible by the Saturday operators when standing at the Stockton Yard:
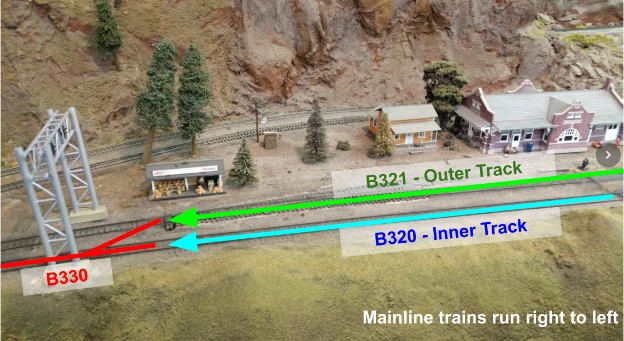
Sonora has the two mainline tracks that merge together at turnout T330, and there’s a signal bridge with signals that clearly indicate the position of the turnout. The problem is that the signal bridge is not visible from across the layout, where the operators are typically standing.
Thus this new experimental signal is located on the pillar -- it’s facing the operators, and it’s high behind the window, hopefully high enough to be visible even when the public is present in front of the layout.
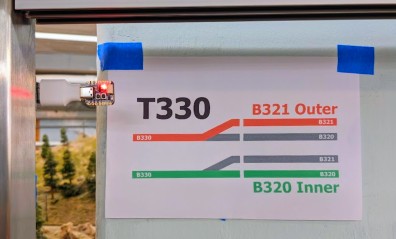
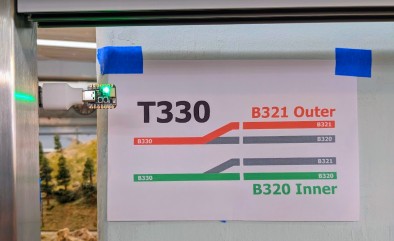
I kept the new signal as simple as possible: green indicates the turnout is aligned straight for the “inner” track (block B320) and red indicates it is thrown for the “outer track” (block B321). Behind the signal, I placed a short explanation to hopefully make it clear what the color represents:
Originally I was going to design this using a pure “analog” solution by plugging two LEDs (green and red) to the output of the auxiliary contacts of the turnout switch machine, like the existing signal bridge does. That turned out to be a bit more complicated than I wanted as it would likely interfere with the existing signal bridge.
And then I realized I could actually "simplify" and reuse stuff I already have -- I came up with a clever trick, namely in this case the signal LED is the onboard LED of an ESP32 using the exact same software as Ambiance, my animated LED strip display along the fascia of the layout!
And the second part of the trick is that it’s really the automation script that drives the color of the LED:
That’s a lot easier than hooking up to the auxiliary contacts of the turnout switch machine, mainly because it’s reusing all the components I already have in place on the layout for the automation, so there was actually not a lot of work to do when doing it this way!
I started by modifying the Ambiance software to be easier to customize its setup: in the CircuitPython settings.toml file, I can now configure the length of the LED strip, its data control pin on the ESP32, and the name of the MQTT topic to control it. In this case, I simply have a LED strip of… 1 LED. That’s the trick! Once I do that, it’s basically the same thing as the animated LED strip display. Ambiance is really event-oriented, thus here I just create events that “animate” the “one LED” with what is essentially a static color that just stays the same until changed.
Once I’ve done that, I can simply program the automation script in Conductor 2 to monitor the state of the turnout T330, and publish a color change to the “1 LED strip” via MQTT:
// The T330 LED is GREEN when the junction B320 --> B330 via T330 Normal is ready.
on { T330.normal } then {
mqtt.publish("turnout/t330/script/event", "Brightness 0.75; Fill #00FF00 1; Trigger")
}
on { !T330.normal } then {
mqtt.publish("turnout/t330/script/event", "Brightness 0.75; Fill #FF0000 1; Trigger")
}
It’s that simple!
The neat side effect of doing it that way is that the signal light responds to turnout changes done both by the automation but also when operators manually use the NCE controller to throw T330. Both actions will change the state in JMRI, which will change the state in Conductor, which will change the state in MQTT, which will change the state on the ESP32 😛


