Model Train-related Notes Blog -- these are personal notes and musings on the subject of model train control, automation, electronics, or whatever I find interesting. I also have more posts in a blog dedicated to the maintenance of the Randall Museum Model Railroad.
2018-09-01 - Conductor 1 and E-Stop
Category Rtac
Another behavior I need right now in Conductor is to have an E-Stop feature when trains get blocked. It’s the 3rd time a train keeps running for an hour or more and is blocked somewhere. Ideally Conductor 2 would have a model of “what’s next” and error management, but I can’t wait for that.
What I need is simple: a route starts, and if the train has not reached the destination in say 10 minutes, send a stop to the train. We can do that trivially using a timer, which is canceled (aka “timer end”) when the train reaches its destination.
Although not exposed through the script grammar, JmriThrottleAdapter (.py) and IJmriThrottle (.java) do have an eStop() method (the estop is only used when triggering an e-stop via RTAC). Right now just using a repeated stop should be enough.
Click here to continue reading...
2018-08-27 - Meanwhile in Conductor 1…
Category Rtac
Conductor 2 is nowhere ready and I need changes now so they go in Conductor 1.
The desired next step is to support the presence-based activation rather than button activation.
Although I have plans for a Conductor 2 which would be route-based, at that point this is an orthogonal task and it can be deferred for later.
Profiles is a Conductor 2 feature, and not tied to a presence sensor.
What is the minimum “clean” approach needed for the sensor presence?
What is the minimum I need to provide?
Click here to continue reading...
2018-08-18 - An update for Conductor 2
Category Rtac
Several angles of discussion for Conductor 2.
First config file. Drop the ANTLR language. Don’t do a DSL using Groovy/Kotlin. Instead let’s keep it simple and use a Jython-based config file (like BUILD files). Sure it won’t be as eye candy as a gradle-like DSL but it might be easier to create and get started.
Example of “pythonizing” the current Conductor 1 script:
B320 = sensor(“B320”, “NS784”) T320 = turnout(“T320”, “NT320”)
PA = route(“Passenger Automation”, blocks=[B310, T310, T320, B320, T330, B330, B340, B350, B360, T371, B370], speed_vars=[“mainline”, “station”, “sonora”]) PA.on(B320, delay=10, events=[PA.throttle.speed(5), PA.throttle.horn()])
profile(“RDC”, route=PA, speed_vars={ “mainline”=20, “station”=8 }, …) |
This is obviously more verbose. There’s a need to carefully stringify arguments and build lists or dicts where needed. However at that point it’s just about building an API, and there’s one benefit in having typed variables (e.g. a sensor var can’t be used where a turnout is used, etc.)
Click here to continue reading...
2018-05-20 - Signal quality in Advanced Tomato
Category Misc
I’ll just leave this here for those who use Advanced Tomato on their wifi routers: the “Quality (%)” column in the Device List is not a percentage at all. It’s just a delta from the client’s RSSI to the interface floor noise in dBm.
From https://github.com/Jackysi/advancedtomato-gui/blob/RT-N/status-devices.asp, line 248:
2018-05-10 - Conductor 2: Desiderata
Category Rtac
How would a Conductor 2 differ from the current version?
Requirements
- Simulator.
- Validation via tests.
- Visual feedback from internal tests, both real and simulated.
State:
- Define JMRI turnouts.
- Define JMRI block sensors.
- Define map graph.
- Define virtual blocks.
- Define routes.
Click here to continue reading...
2018-04-21 - Mobius Action Cam vs Runcam 2
Category Video
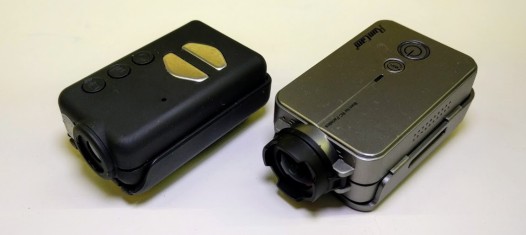
The latest video I did was an update of the full “cab ride” layout tour of the Randall Museum layout.
In the past I’ve used the same camera as for all my previous cab rides, a Mobius Action Cam. When I tried to use it after a year of inactivity, I realized the battery is dead and won’t hold a charge for more than 10 minutes. I can order a new battery, but maybe it was worth looking at what had changed in the domain in between. Let’s look at the Runcam 2.
Click here to continue reading...
2018-01-21 - Turnouts Touch Panel for JMRI at CMRS
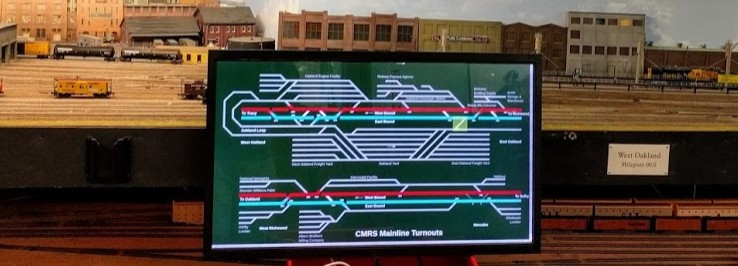
Category CMRSSome members at the CMRS train club (the Carquinez Model Railroad Society, in Crockett, CA) desired to have large touch panels that members could use to toggle switches on the mainline. For testing, one of the members procured 32-inch touch panels and I wrote a quick experimental software to display the mainline on it and control turnouts based on touch.
The touch panels rely on the main JMRI server to trigger turnouts on the mainline.
This post documents my first prototype demonstration for this project. This was going to be an iterative process as I expected to incorporate feedback later. What I came up with is fairly easy to reuse for other layouts -- I’ve implemented something similar at Randall just after, so I’ll explain how it is implemented in the hope others want to use that or get inspired by it..
Click here to continue reading...
2017-10-31 - NCE AIU and Short Trigger Events
Category NCE
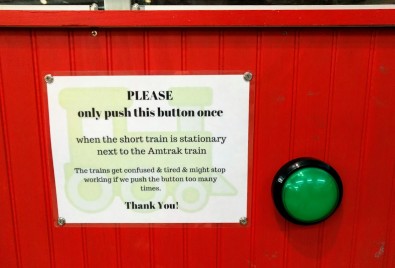
On the Randall layout, visitors press a button to trigger the trains’ automated sequence to start. Very quickly we noticed that sometimes the system would fail to notice the button was pressed.
We use a large button but that’s irrelevant. The issue has to do with how long it is pressed. Most people give a quick short push, and that’s the problem.
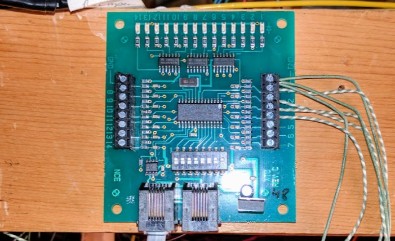
The button directly closes the contacts on an NCE AIU01 (Auxiliary Input Unit), which is regularly polled by the NCE command station. The computer runs my Conductor software which polls JMRI for the status at at least 30 Hz. The AIU01 is polled by the NCE Command Station at an appalling low refresh rate due to the NCE cab bus implementation: if an input doesn't trigger long enough (e.g. 1 second), it will be easily missed. In this case, it’s enough to give a short but quick push to the button and most of the time miss the polling window. The event is simply missed.
Question is what would be the simplest circuitry possible to make an input trigger longer?
Click here to continue reading...
2017-04-12 - Powering a LED off DCC
Category DCC
Very interesting discussion here: http://cs.trains.com/mrr/f/744/t/230553.aspx
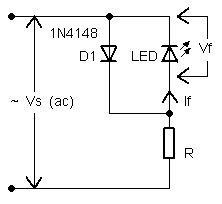
Summary, TL/DR: We can power a LED directly from DCC, just add a resistor to limit to about 10 mA (or less if too bright).
Suggestion is "nice to have" a reverse parallel diode to limit the reverse voltage on the LED:
However another comment indicates it's enough to compute R to be within the specs of the reverse voltage of the LED (assuming I have the specs).
Click here to continue reading...
2017-04-10 - Layout #3 “Test Track”
Category Layout
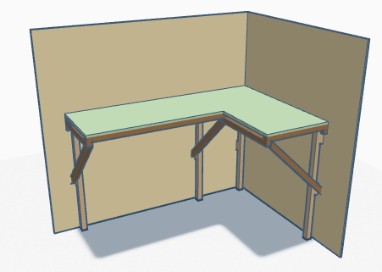
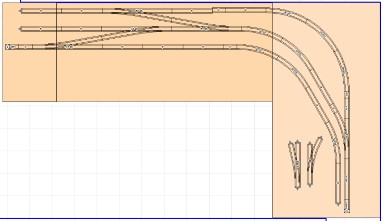
I tore down my previous layout #2 since it didn’t have a purpose anymore -- originally it was for the kids to play with and for me to play with cameras recognition of trains and automation. I’ve done my part, and the kids didn’t show interest anymore. Being a 4x9”, it was still taking valuable space in my small room. Time to update.
What I cared for is having a workbench and a simple test track on top of it. I came up with a very simple L-shaped workbench design. The workbench is designed to not have any legs in the way and lots of storage space underneath. For the test track, I have a bunch of EZ-Track around so I just used that. It’s suitable for minor switching. I won’t add any scenery, it does not need to look like a shelf layout since it’s a workbench.
Click here to continue reading...


